Almost nobody in this industry publishes their prices. You send an enquiry, wait two days, and get a number with no explanation of how it was reached — which makes it impossible to know whether you are being quoted fairly, or to budget a project before you have won it.
So here is the honest version: what interior 3D rendering costs across the market, what actually moves the price up and down, and how to brief a studio so you pay less without losing quality.
The short answer
For a single interior view, the market broadly sits in these bands:
- $250 – $500 — simple. One camera angle, a straightforward room, mostly library furniture, minimal custom detail.
- $600 – $1,200 — standard residential. A properly lit, well-composed room with your actual specification, styled and revised. Most designer work lands here.
- $1,500 – $2,500+ — high detail. Bespoke joinery modelled from your drawings, complex or mixed lighting, hero-quality finish for marketing or presales.
- $5,000+ — premium and specialist. Large commercial scenes, animation, virtual tours, or campaign-grade imagery.
Those are per-image figures for the first image of a space. Which brings us to the single most useful thing to understand about rendering costs.
You are not paying for a picture. You are paying for the model behind it.
Why the second image of a room is much cheaper
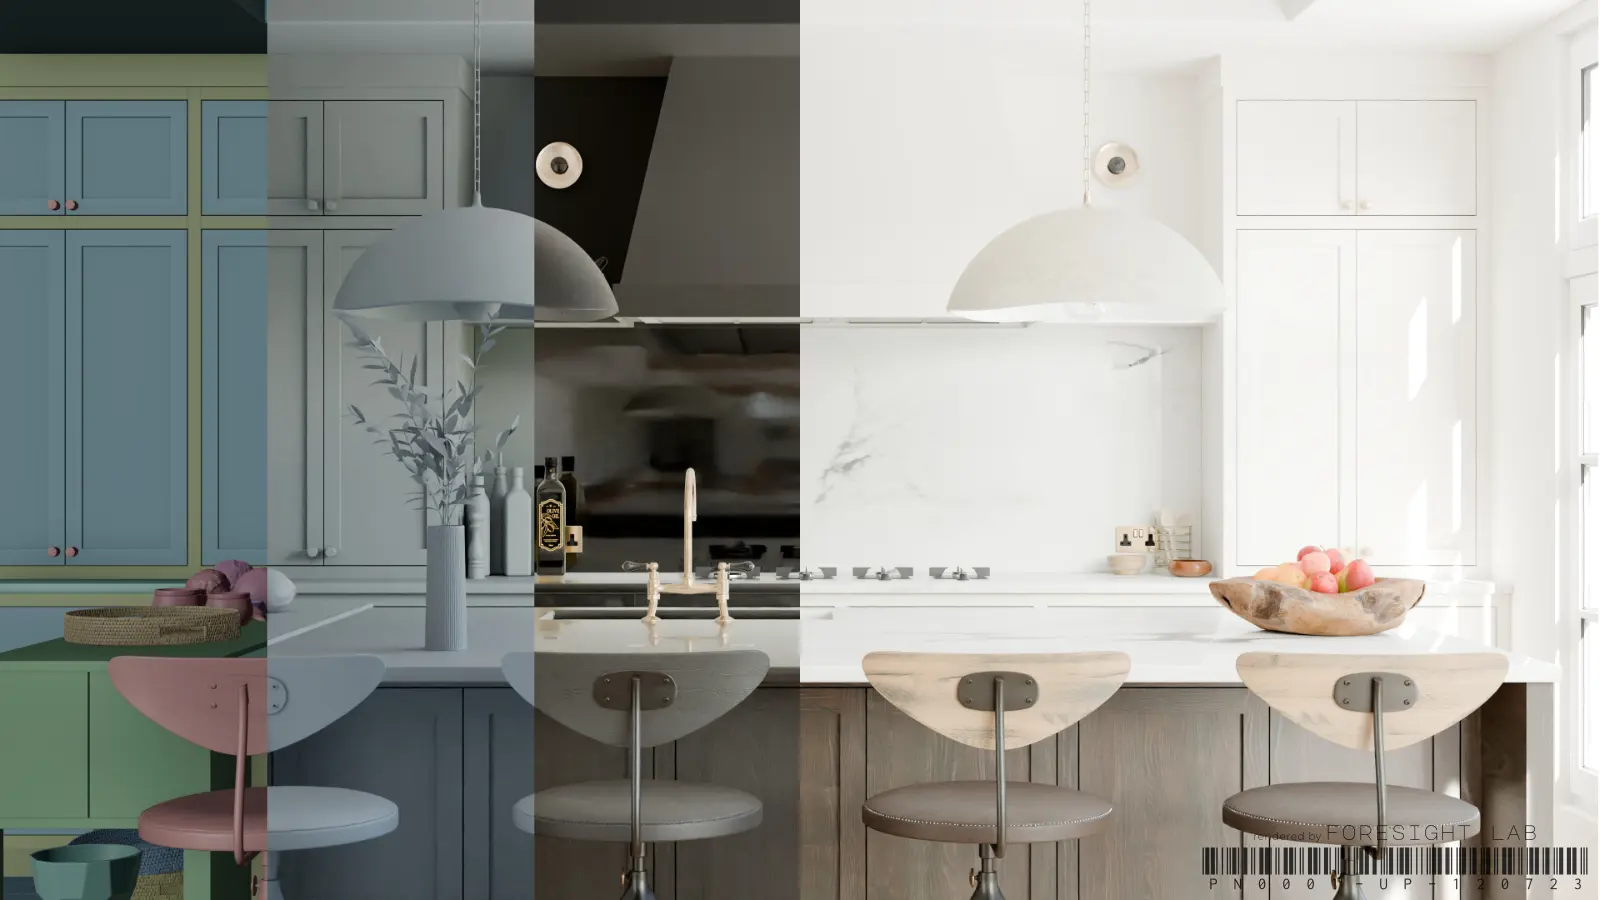
Most of the cost of your first render is invisible: building the geometry, applying and tuning materials, and lighting the space until it behaves like a real room. The final image is the last hour of a long process.
Once that model exists, another camera angle reuses all of it. That is why one view of six different rooms costs far more than six views of one room — and why studios quote a lower rate per image as the set grows. If your budget is tight, going deeper on fewer spaces buys more usable imagery than spreading thin across many.
What actually drives the price
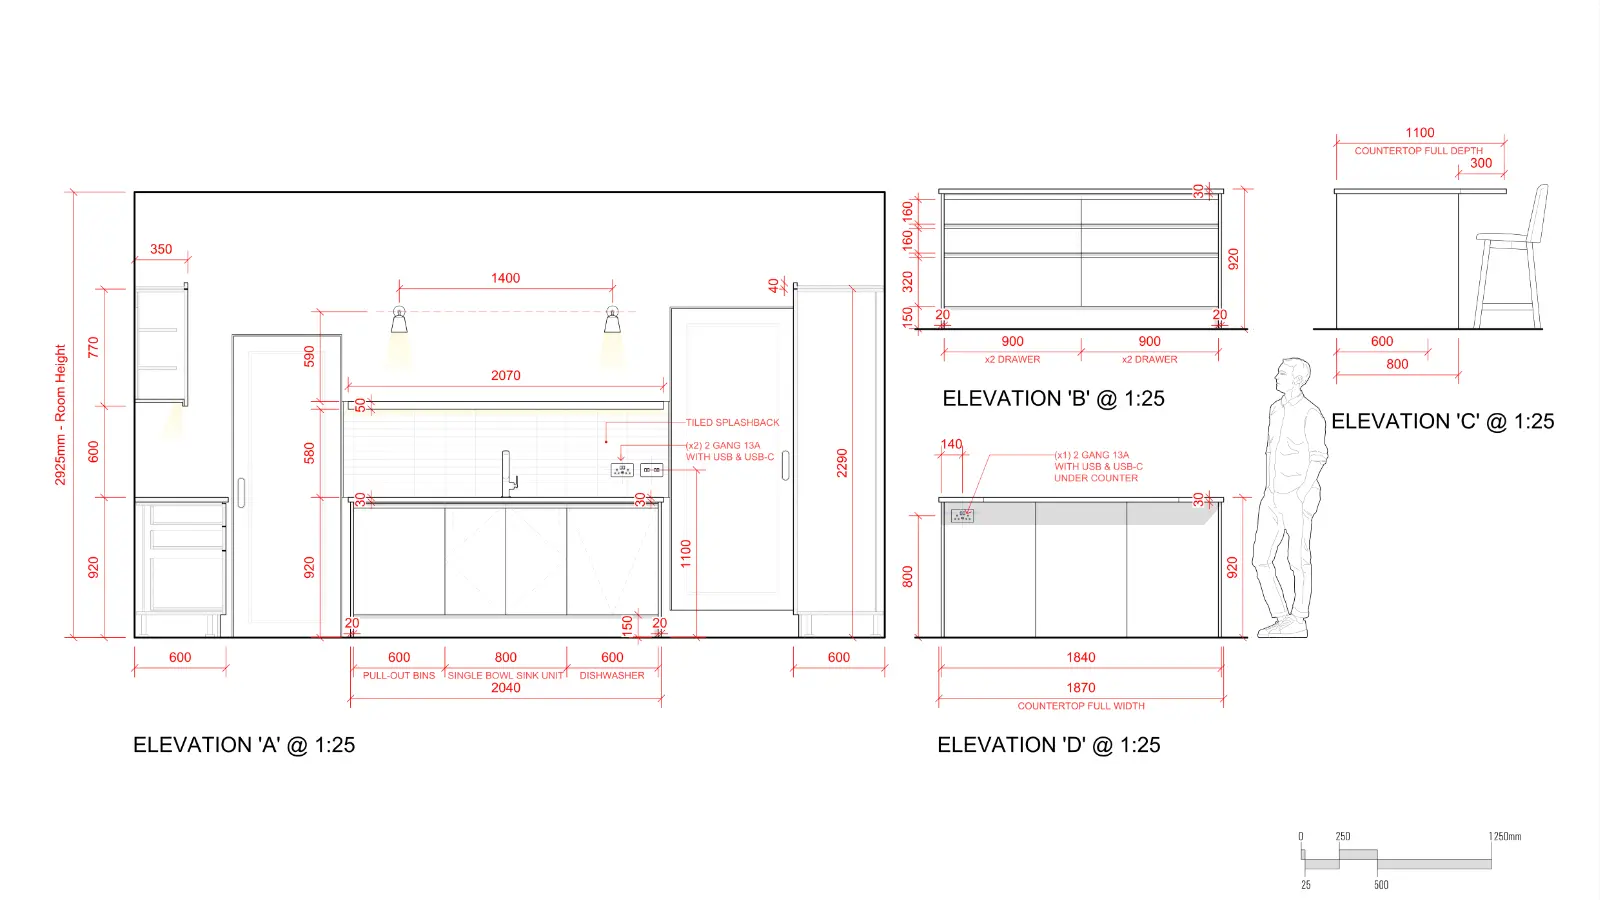
- Custom vs. library. A sofa from a 3D library is minutes. Your client's bespoke island, fluted joinery or curved stair is modelled from scratch — that is where hours go.
- Lighting complexity. A daylit room with one window is straightforward. Evening scenes, mixed colour temperatures, cove and accent layers all take longer to balance.
- Number of views. As above — the marginal cost falls after the first.
- Resolution and output. Web-sized stills are cheaper than print-resolution or wall-sized marketing pieces; animation and tours are a different category entirely.
- Turnaround. Rush work costs more everywhere, because it displaces other scheduled projects.
- Brief quality. The quietest cost multiplier of all. A complete brief renders once; a vague one renders three times.
What we charge
Published, because a page arguing that studios should be transparent about price and then hiding its own would be a poor advertisement. These are our standard rates for interior design visualisation. Everything below includes two rounds of revisions.
| Scope | First image | Each further view |
|---|---|---|
| Single space One room — bedroom, bathroom, study, single-run kitchen | $575 | $50 |
| Open-plan space Kitchen + dining, kitchen + living, or any two zones read as one room | $775 | $100 |
| Exterior Elevations, garden views, street approach | $1,250 | $100 |
| Product on white A single piece on a seamless backdrop, catalogue style | $275 | $75 |
| Product in a set The same piece staged in a built interior scene | $495 | $95 |
The reason further views drop so sharply is the one described above: the first image pays for the model, the lighting and the materials. A second angle of a room we have already built is genuinely inexpensive to produce, and we price it that way rather than pretending otherwise.
What is included as standard
- Two revision rounds at each image, covering camera, lighting, finishes and dressing.
- 4K delivery — 3840 px on the long edge, as JPG and PNG.
- A print-ready export at 300 dpi where you need one.
- Perpetual commercial licence for the finished images — marketing, sales, planning, print and web, with no expiry and no additional fee.
What costs extra
| Item | Fee | When it applies |
|---|---|---|
| Third and further revision rounds | $85/hr | Agreed in writing before any time is spent |
| Rush turnaround | +40% | Delivery inside five working days |
| Bespoke modelling | from $120/item | Custom joinery or a piece with no available model |
| Source files | from $400/scene | Licensed separately; not included by default |
| Commercial & hospitality | from $1,450 | Restaurants, hotels, retail — larger spaces, more coordination |
How a real project prices up
A kitchen and dining room with four views — two hero angles, one from the hall and one detail — is $775 + 3 × $100 = $1,075, or about $269 an image. A single bedroom with two views is $575 + $50 = $625.
Payment is 50% to start and 50% on delivery. Terms are 14 days. We will always quote a fixed figure before beginning, and that figure does not move unless the scope does — in which case you will get it in writing first.
How these figures compare with the rest of the market
A studio publishing its own price bands is an interested party, so check them against studios with no reason to agree with us. Published 2026 guides put standard interior stills in broadly the same place: NoTriangle Studio and Realspace3D both publish pricing guides, and the wider range quoted across the market runs from roughly $250 for a simple view to several thousand for campaign-grade commercial imagery.
Two things are worth noticing in that spread. Region explains a large part of it — the same image is priced differently in New York, London and Manila, and the difference is labour cost rather than quality. And the very low end is usually quoting something narrower than you are imagining: a single camera, library furniture, no revisions and no styling. Compare what is included before comparing the number.
How to compare two quotes honestly
Quotes for the same job routinely differ by three times, and almost always because they describe different work. Six questions make them comparable:
- How many images, and how many cameras? Three views of one room is not three images of three rooms.
- What is modelled bespoke? Joinery built from your drawings is the single biggest cost line, and the one most often assumed away.
- How many revision rounds, and what counts as one? See what a round actually is.
- What resolution, and what licence? Print, presentation and paid advertising are different rights and sometimes different prices.
- Who styles it? An unstyled render of a correct room still looks empty.
- What happens if the brief changes mid-way? Ask before, not after.
A quote that answers all six may look dearer than one that answers none. It is usually the cheaper of the two by the end.
How to pay less without losing quality
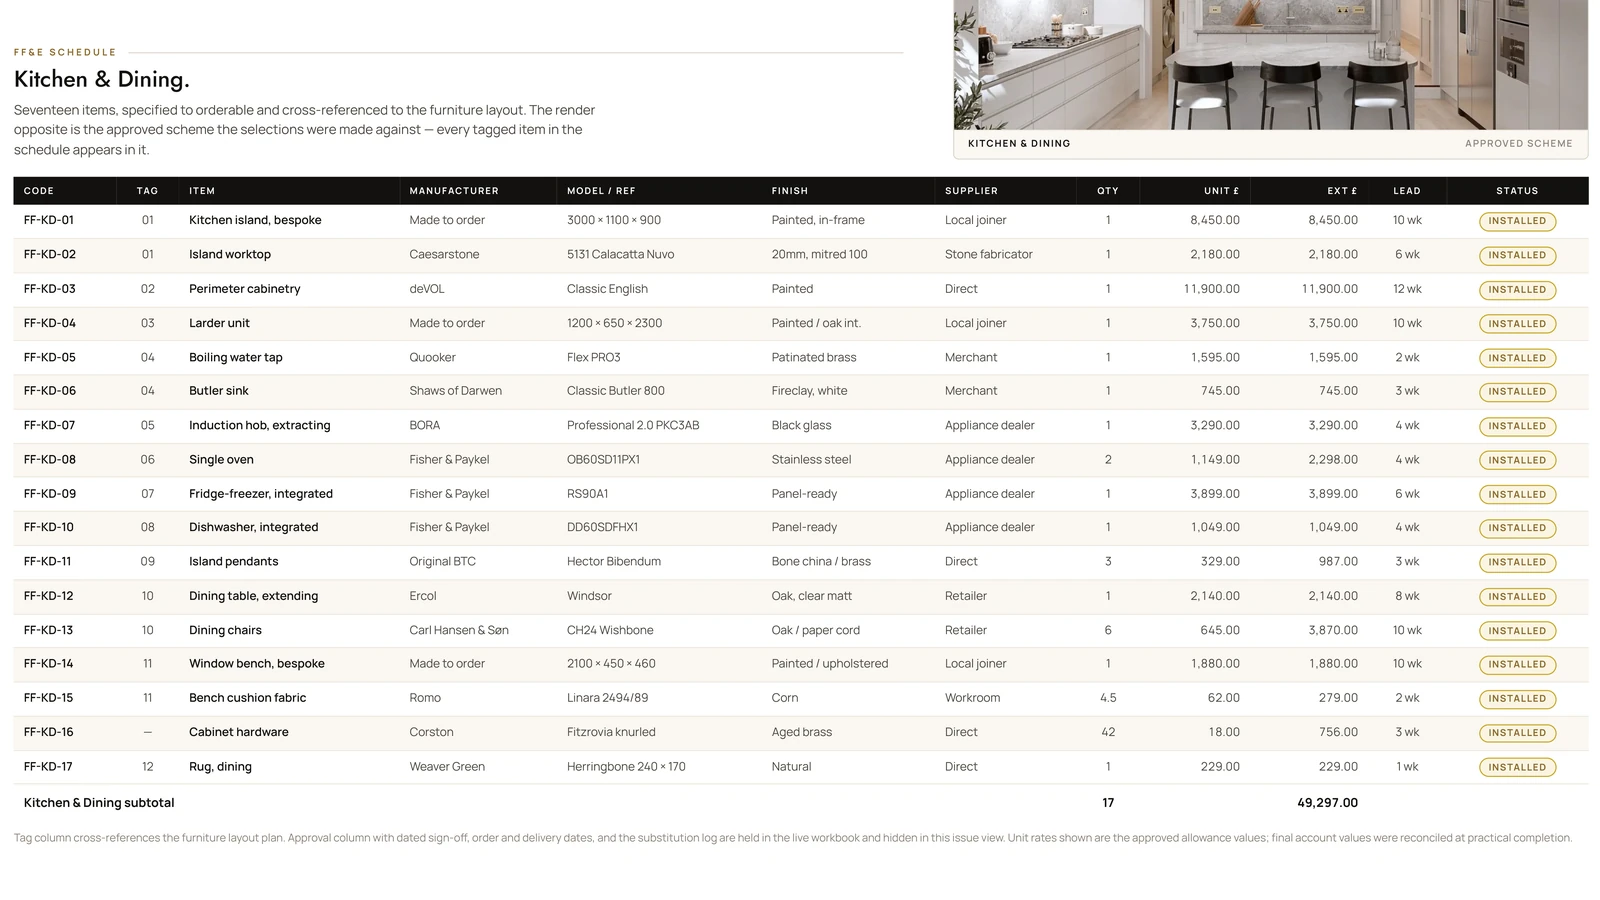
- Send a complete brief the first time. Plans with dimensions, elevations, your actual FF&E specification, finish codes, and reference images for mood. Every gap becomes an assumption, and assumptions become revisions.
- Batch your views. Decide all the angles you want of a space up front so the model is built once.
- Give realistic time. Rush fees are avoidable; a schedule agreed two weeks earlier costs nothing.
- Be decisive about finishes before modelling starts. Changing a material after lighting is set is far more expensive than choosing it beforehand.
- Use one studio across a project. Models, materials and your studio's visual language carry between rooms and phases.
When cheap gets expensive
Very low quotes are rarely fake — they are just a different product. Usually it means stock furniture standing in for your specification, generic lighting, and one revision round. That is perfectly fine for testing a layout internally.
It becomes expensive when the image goes in front of a client. If the render shows a sofa that isn't the sofa, in a light that isn't the light, you are asking your client to approve something that will not be built — and the gap surfaces later as a change order, a re-render, or a difficult conversation on site. Accuracy is not a luxury tier; it is the entire point of the exercise.
Quick answers
How much does one interior rendering cost?
Roughly $250 for something simple, $600–$1,200 for standard residential work, and $1,500–$2,500+ where custom modelling and complex lighting are involved.
Why is the second image cheaper?
The first image pays for the model; further angles reuse it.
What makes a render more expensive?
Bespoke items modelled from scratch, complex lighting, high resolution, animation, rush turnaround, and incomplete briefs.
Is cheap rendering worth it?
For internal tests, often yes. For client approval, an inaccurate render is the most expensive image you can buy.
If you would like a straight number for a specific project, send the plans and the views you need — see how our rendering service works, or tell us about the project and we will come back with a fixed quote and a date.